
|
 |
|
Comet Go Kart Belt Catalog. Genuine Comet Drive Belts: Asymmetric Comet 30 Series Belts and CAT99 Belts. Symmetric Comet 20 Series Belts, Comet 40 Series Belts, 44 Series Belts and Comet 500 Series Belts. Comet Torque Converter Belt Size Charts. CVT Belts - UTV Belts. Comet Belt Tech Support. Comet Industries Belts.

1. Determine the Series Type. (Comet Model Number)
2. Measure the "Outer Diameter" (O.D.) of the Driven Pulley on the Jackshaft.
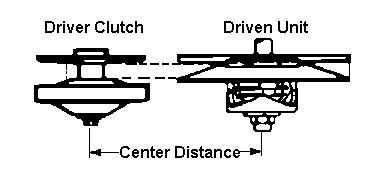
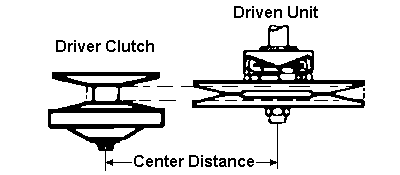
3. Measure the "Center Distance"; which is the exact distance between the Center of the Engine Crankshaft and the Center of the Jackshaft or Secondary Shaft. Must be Precise.
4. Use the two measurements; the driven pulley outer diameter and center distance measurement to determine the correct belt part number from the relevant chart below. Should your machine's center distance fall between the center distance settings listed here, select from the two belts, the one with the larger outside circumference (O.C.) for best wear and to avoid machine "creep" during idling.
Note: The Comet 20 Series and Comet 30 Series Driven Pulleys both have a #20 Stamped on them. Ignore the 20 Stamp completely, it's not a series indicator, it's the degree of the angle of the component.
Remove the bolt and any keepers from the end of the engine crankshaft, and take the outer half of the clutch off. Clean the clutch. Make sure both components are perfectly aligned. Flat washers and shims are used as spacers. Do whatever it takes to align both components so the side of the belt won't wear down prematurely and litter the system with belt debris. Align the sprockets so the chain will stay on. If you can install the belt without taking the clutch apart, the belt is too long.
If the system is 'eating belts' do not install a new belt until the problem has been corrected. A damaged belt is the symptom of another problem.
Some machines may require a different belt if the original engine has been replaced, which usually changes the center distance, or, if the original driven pulley has been replaced with a different outer diameter component.
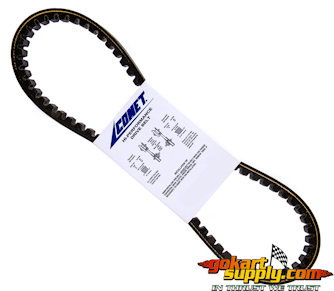
3/4" Top Width, 20 1/2° Asymmetric
(18° + 2 1/2°) - 0.40" Thick
- Kevlar
 | ||||||||||||||||||||||||||||||||||||||||||||||||||||||||||||||||||||||||||||||||||||||||||||||||||||||||||||||||||||||||||

Comet 203591A Fits Yerf Dog
Model #1400, 3002, 3200, 3202, 3203, 3203A
3205, 30021, 30034A, 32001, 33002 and 33200.
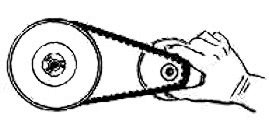
Select belt for the nearest approximate shaft setting. Check belt tension. The belt should be at it's highest point in the driven pulley flanges. Remove the outer half of the driver clutch. Squeeze the belt down and pull it forward as shown. Position the engine so that 1/8" to 3/16" of clearance is provided around the clutch bushing/hub.

5/8" Top Width, 20 1/2° Asymmetric
(18° + 2 1/2°) - 0.40" Thick
- Kevlar
 | ||||||||||||||||||||||||||||||||||||||||||||||||||
3/4" Top Width, 30° Symmetric
(15° + 15°) - 0.40" Thick - Kevlar
 | ||||||||||||||||||||||||||||||||||||||||||||||||||||||||||||||||||||||||||||||||||||||||||||||||||

5/8" Top Width, 30° Symmetric
(15° + 15°) - 0.40" Thick - Kevlar
 | ||||||||||||||||||||||||||||||||||||||||||||||||||

7/8" Top Width, 30° Symmetric
(15° + 15°) - 0.45" Thick - Kevlar
 | ||||||||||||||||||||||||||||||||||||||||||||||||||||||||||||||||||||||||||||||||||||||||||||||||||||||||||||||||||||

.920 Top Width, 30° Symmetric
(15° + 15°) - 0.45" Thick - Kevlar
 | ||||||||||||||||||||||||||||||||||||||||||||||||||||||||||||||
Comet Belts are not elastic and should not be viewed as a rubber band. With the sophistication of drive belts and drive systems found in today's machines, the drive belt can do much damage to the entire system if the proper belt is not used or if the drive system is not properly aligned and adjusted. In earlier years, the drive system was considered a part of the machine that merely blew alot of belts. Many belts then were of the variety that if the drive system was not properly aligned and adjusted the belt would stretch and in most cases disintegrate before doing much damage to the clutch or driven unit. Today, however, emphasize belt and drive systems have attained such sophistication that if the drive system is not properly aligned or adjusted, or if the wrong belt is used, the belt may tear up the drive system before stretching or breaking. For that reason alone, and to eliminate the expense, trouble and possible safety hazard of blown belts or damaged clutches, the drive system on your vehicle should be given extra care to be sure it's operating properly. Basic guidelines are that the belt be checked periodically for uneven wear. If any irregularities appear in the system or on the belt, have the system adjusted immediately.
Check to make sure all of the black plastic cam buttons in the driven pulley are in place. Do not run the system if any of the buttons are missing. Missing buttons will allow the driven pulley to open too far allowing the belt to fall down into an area of the pulley where rivets are present. These rivets will destroy the belt. The buttons also keep the movable sheave from spinning, they reduce friction between the cam and the movable sheave and they prevent metal to metal contact thus acting as shock absorbers. The buttons play a very important role in the performance of a torque converter system. If you do have to replace buttons, glue the buttons into place with contact cement or a similar product.
If your system is "eating belts" do not install a new belt until the problem has been corrected. A destroyed belt is the symptom of another problem.
Erratic engagement is most often caused by the driver clutch that is mounted on the engine crankshaft. The flyweights in the clutch are sticking or the movable sheave is binding on the hub. Knowing how they work may help you determine why yours doesn't. As engine rpm increases, the flyweights push against the outer drum and force the movable sheave (pulley face) toward the engine causing the belt to travel at a greater circumference around the driver clutch. This action in turn causes the belt to force open the driven pulley, allowing the belt to travel at a lesser circumference around the driven pulley.
As engine rpm decreases, the spring in the driven pulley closes the pulley forcing the belt to a greater circumference. This action overcomes the force of the flyweights against the movable sheave and causes the driver clutch pulley to open, allowing the belt to travel a lesser circumference around the driver clutch.
When the engine is at idle, the driver clutch pulley should not engage the sides of the belt. The belt should be loose in the pulley and resting on the bronze bushing around the hub. The bronze bushing serves to protect the belt from rubbing against the spinning hub at idle and also to support a portion of the movable sheave as the sheave moves toward the engine during engagement.
The movable sheave must be able to slide freely on the splined hub without binding. Disassemble the driver clutch and clean away any dirt or lubricant residue using an automotive parts cleaning solvent. Do not use a petroleum based lubricant inside the driver clutch or between the hub and movable sheave. Use a dry, molybdenum based lubricant. The extreme heat and pressure inside the driver clutch chars most petroleum based lubricants. Petroleum based lube also collects dirt which causes increased wear. Graphite lube is better than petroleum lube, but it also eventually leaves a residue that builds up on the parts, causing them to bind and require more frequent cleaning. Experience has taught us that Comet Spray Lube works best.
Trouble Shooting | ||
Problem |
Causes |
Solutions |
Belt worn thin in |
Excessive Clutch slipping |
Rotate by hand to free up. |
Clutch turns |
Idle set too high. |
Reduce Engine R.P.M. |
Belt Worn Cup Shaped |
Too much run |
Repair/Replace Clutch |
Belt Disintegration |
Excessive Belt Speed |
Reduce R.P.M. |
Belt Roll Over |
Components out of line. |
Align System |
Cord Breakage |
Misalignment of System |
Align System |
Cracking between |
Belt is Wearing Out. |
Replace the Belt |
Broken or Torn Cogs |
Belt not installed right. |
Check for Interference |
Belt worn uneven |
System out of line. |
Align System |
The Belt looks |
Extra slippage, not |
Check Clutch Springs |
Belt Top width worn |
Components out of line. |
Check for proper |
Factory Authorized Distributor

![]()
Page Last Updated: 04/14/2025
© 1997-2025 Go Kart Supply, Inc